Build mixed reality experiences that can see the world around you.
Unity samples for Meta Quest 3 and Quest 3S: sample real-world colors, detect objects, track QR codes, create camera-based shader effects, ask questions about your surroundings, and stream video to another device.



Quick start · Samples · Troubleshooting · Builds & testing · Community showcase
- Quest 3 or Quest 3S, configured for development, with USB debugging authorized and headset software that supports the camera and spatial features you want to use.
- Unity 6000.3.12f1, installed through Unity Hub with Android Build Support, Android SDK & NDK Tools, and OpenJDK.
- Git and Git LFS, plus network access for Unity Package Manager.
- Touch controllers for the sample menu. Individual samples may also support hand interactions.
Use a headset build to test the camera workflows. An Editor preview does not establish on-device camera or tracking behavior. See Meta’s Passthrough Camera API documentation for platform requirements.
git lfs install
git clone https://github.com/xrdevrob/QuestCameraKit.git
cd QuestCameraKit
git lfs pull- Open
Unity-QuestVisionKitin Unity Hub with the editor version above. - Let Package Manager finish importing the pinned dependencies. QR tracking uses the included Meta MRUK package; WebRTC dependencies resolve automatically.
- Select Android in Build Profiles and connect your headset.
- Enable Development Build for the included Quak test setup, then choose Build and Run. See release-build settings before making a non-development build.
- Keep the headset awake, accept the relevant camera/spatial-data permissions, and choose a sample from the menu.
The build includes all seven headset samples, starting with ColorPicker. The desktop WebRTC receiver and the puppet-tracking signaling server are separate.
| Action | Quest controller | Editor keyboard |
|---|---|---|
| Show or hide menu | Y | M |
| Choose sample | Left thumbstick up/down | ↑ / ↓ |
| Open sample | X | Enter |
Scenes live in Unity-QuestVisionKit/Assets/Samples.
| Sample | Explore | Scene |
|---|---|---|
| Color picker | Map a point in the room to a camera pixel | ColorPicker |
| Object detection | Run inference and place detection markers in 3D | ObjectDetection |
| Native QR tracking | Read QR payloads and display spatial bounds with Meta MRUK | QRCodeDetection |
| Camera shaders | Stereo camera mapping, frosted glass, and portal effects | CameraMappingForShaders |
| Image + voice AI | Ask a spoken question about a camera image | ImageLLM |
| WebRTC streaming | Send camera video to a receiving peer | WebRTC-Quest |
| Puppet tracking | Stream passthrough video of a physical puppet to a web viewer | PuppetTracking-Quest |
The demos below illustrate the samples; they were captured with earlier project versions.
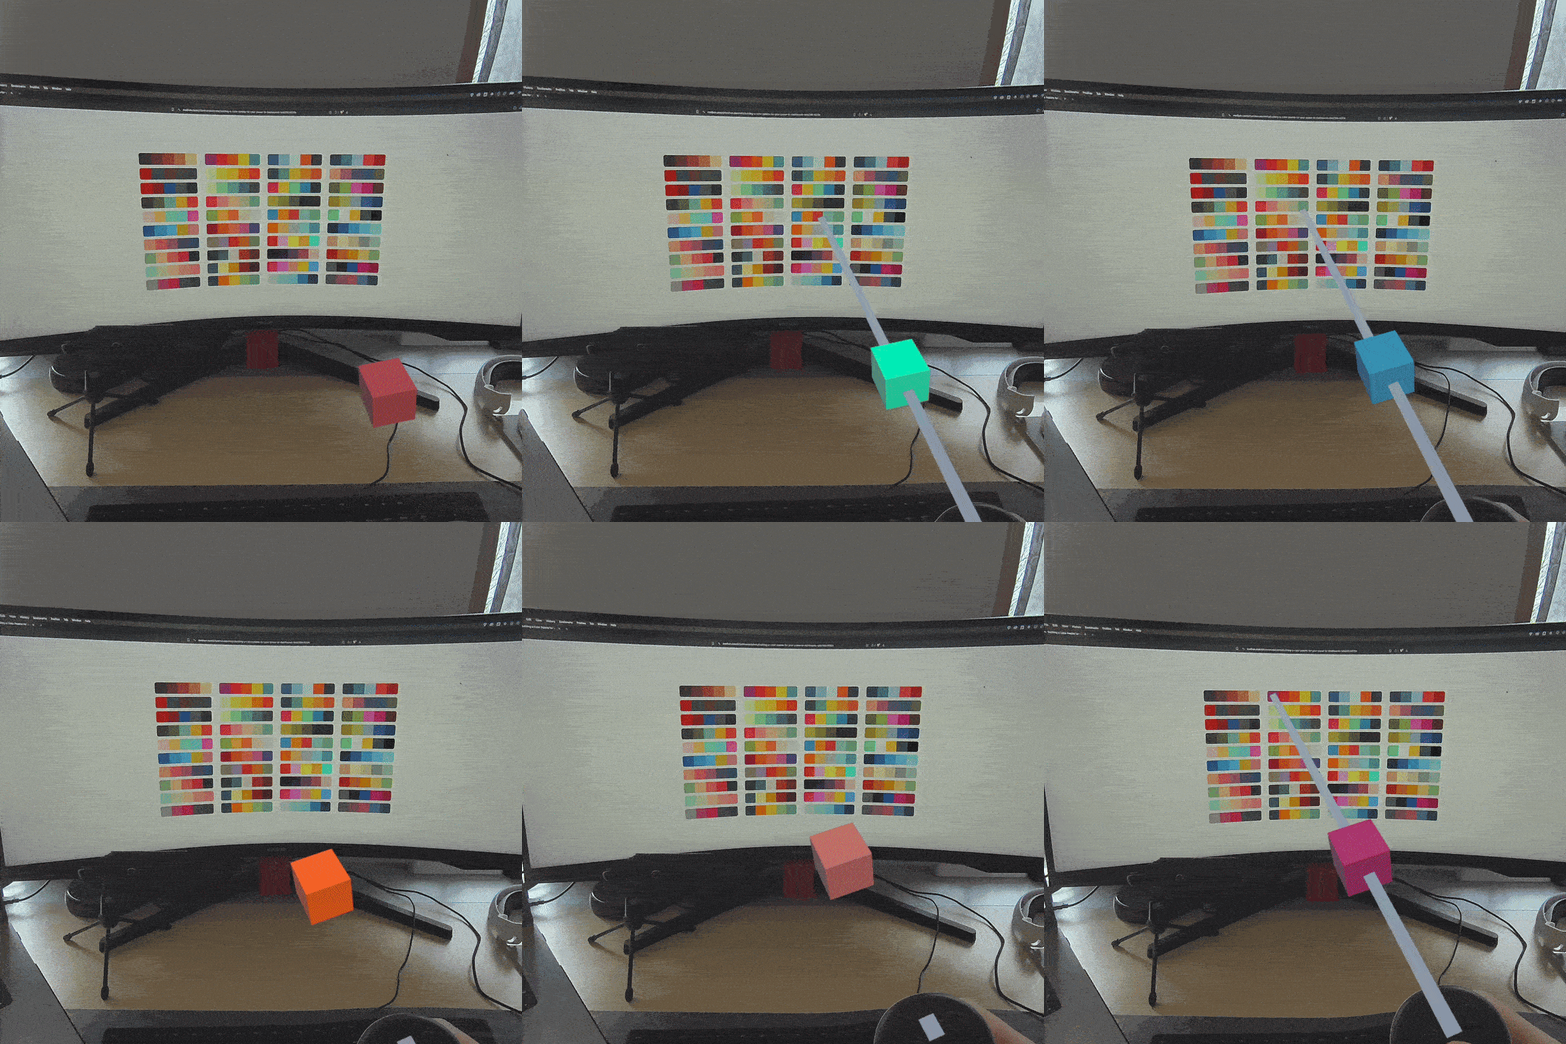
Aim at a surface and press/release A to sample its color. The sample uses environment raycasting to locate a point in the room, projects it into the camera image, and applies the sampled color to a virtual object.
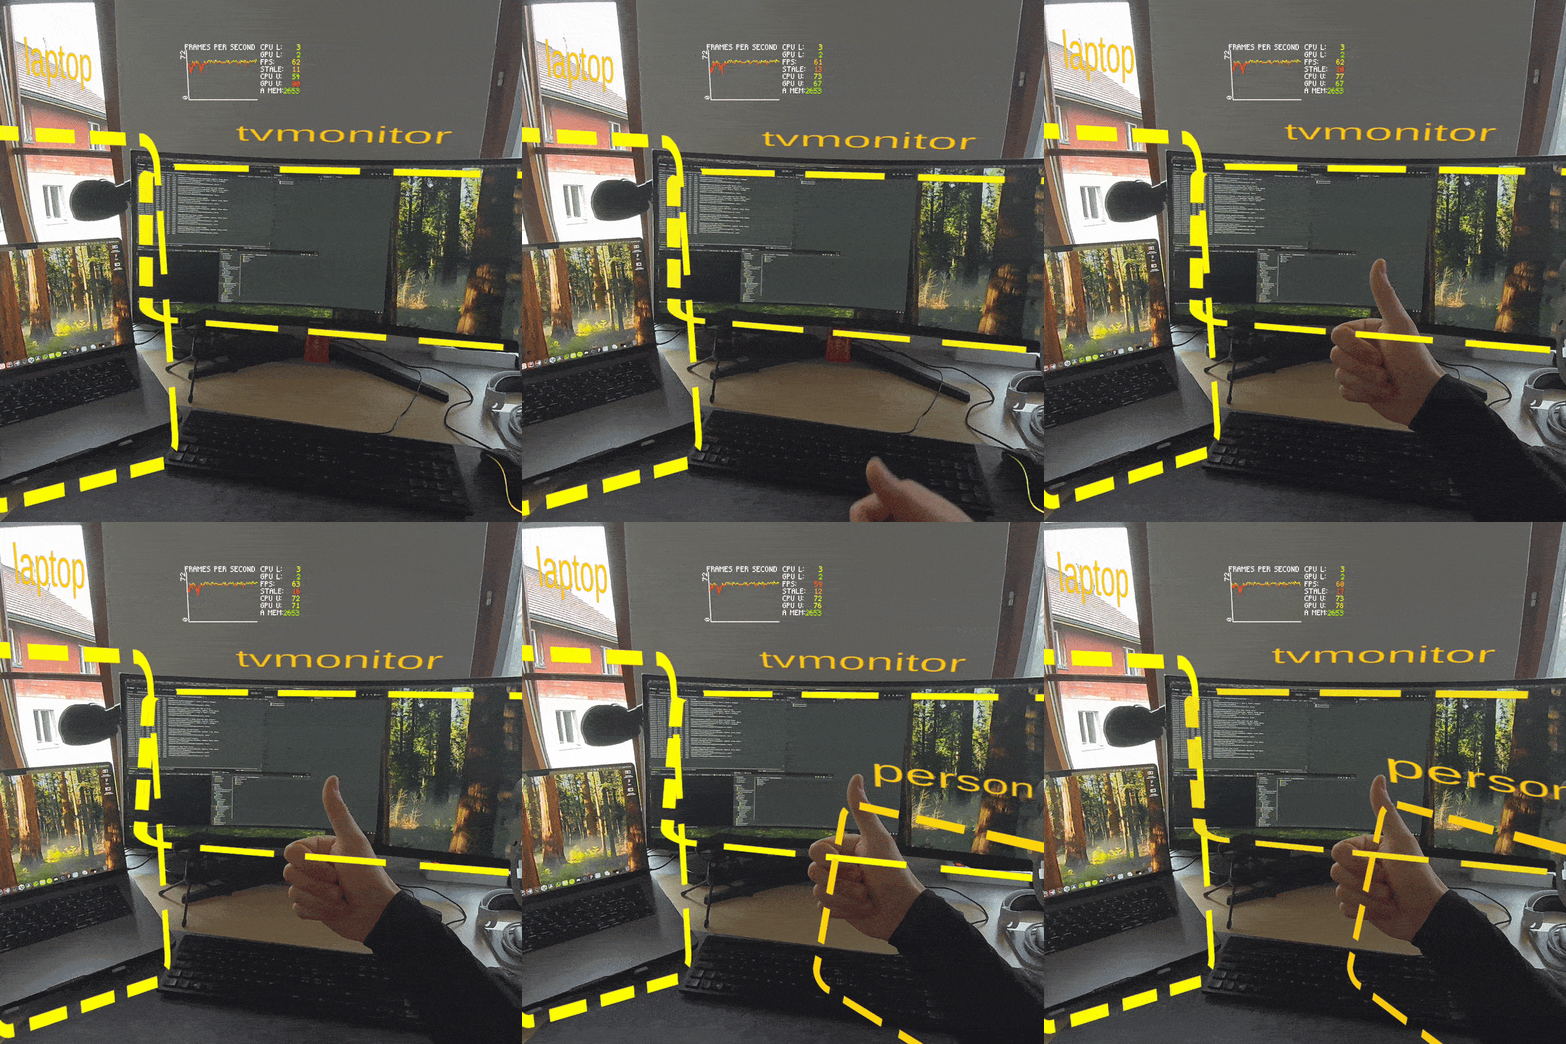
Run the bundled YOLO model with Unity Inference Engine and project its detections into the room. Detection runs automatically. Configure Label Filters on ObjectRenderer to show selected classes, or leave the list empty to show all model classes. Confidence filtering applies when the model supplies scores.
See the supported labels. Detection accuracy and performance depend on the scene, model, and device.
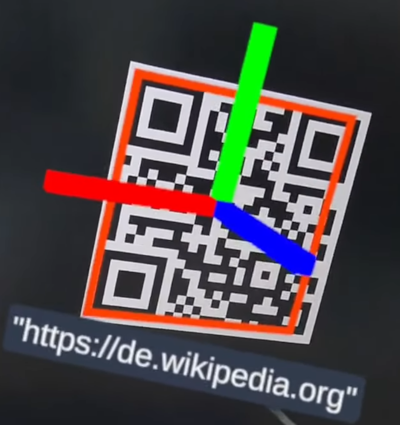
Detect QR codes through Meta MRUK, with no additional decoder or NuGet setup. The sample displays the decoded payload and the bounds supplied by native tracking.
Use the controller-mounted panel to request Scene / spatial-data permission, check support, and enable tracking. Present a clear, well-lit QR code. Native tracking updates spatial poses over time; it is not intended for fast-moving object tracking. See Meta’s QR tracking guide for requirements and limitations.
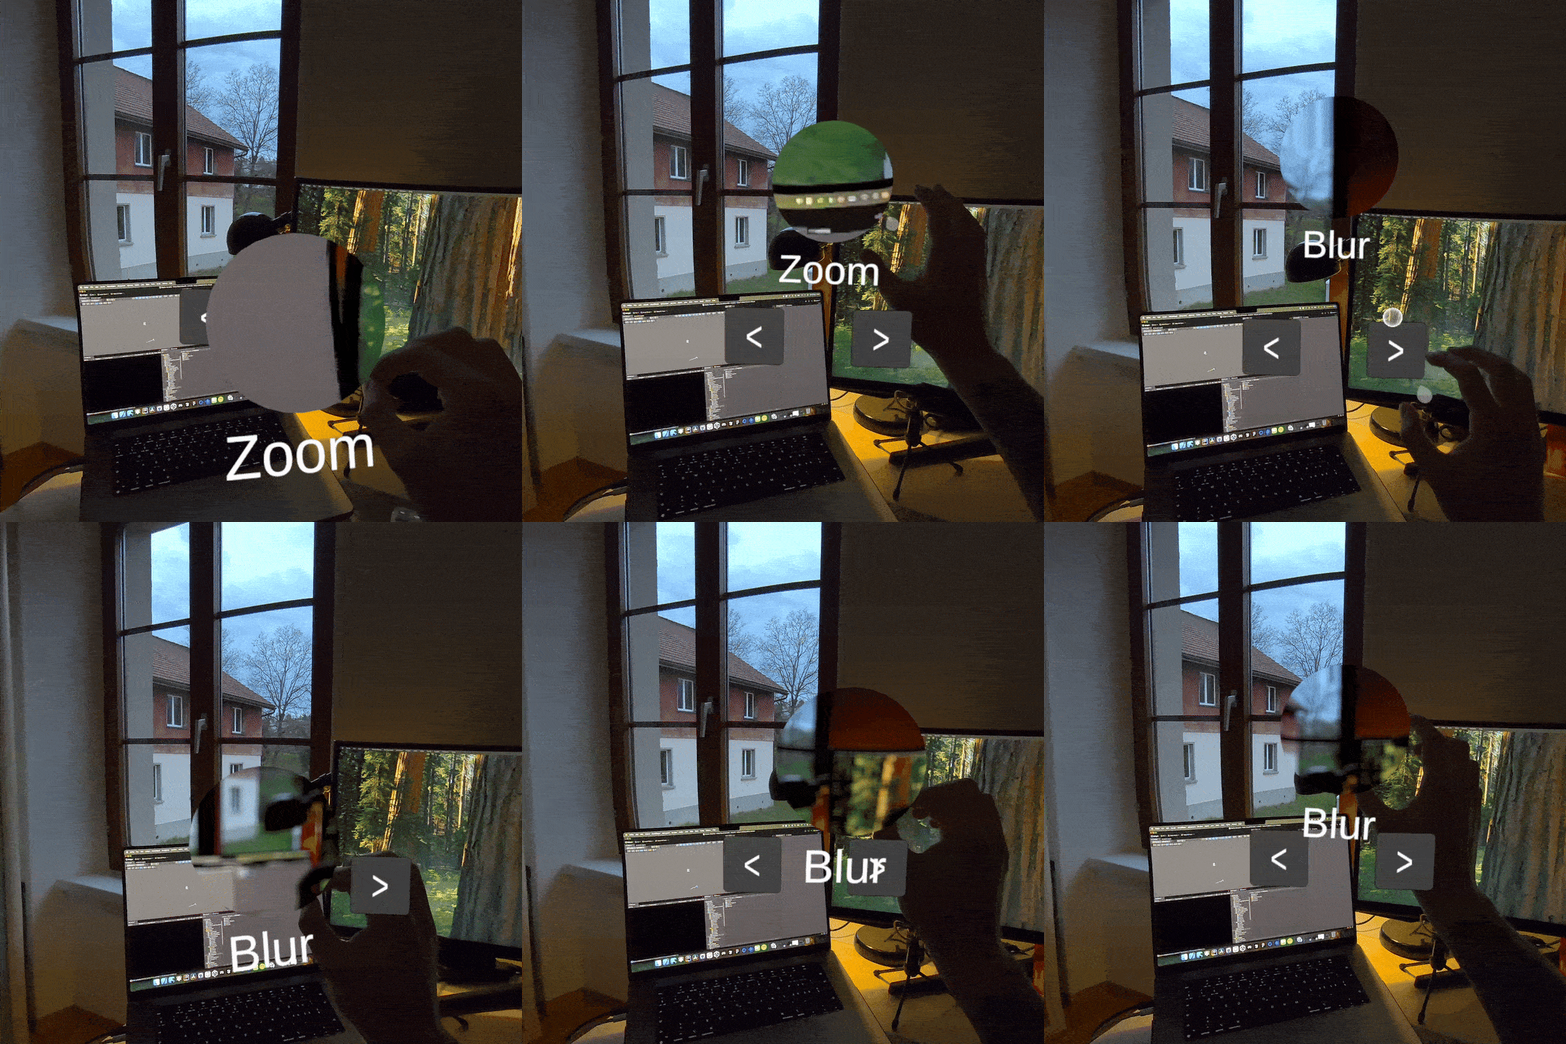
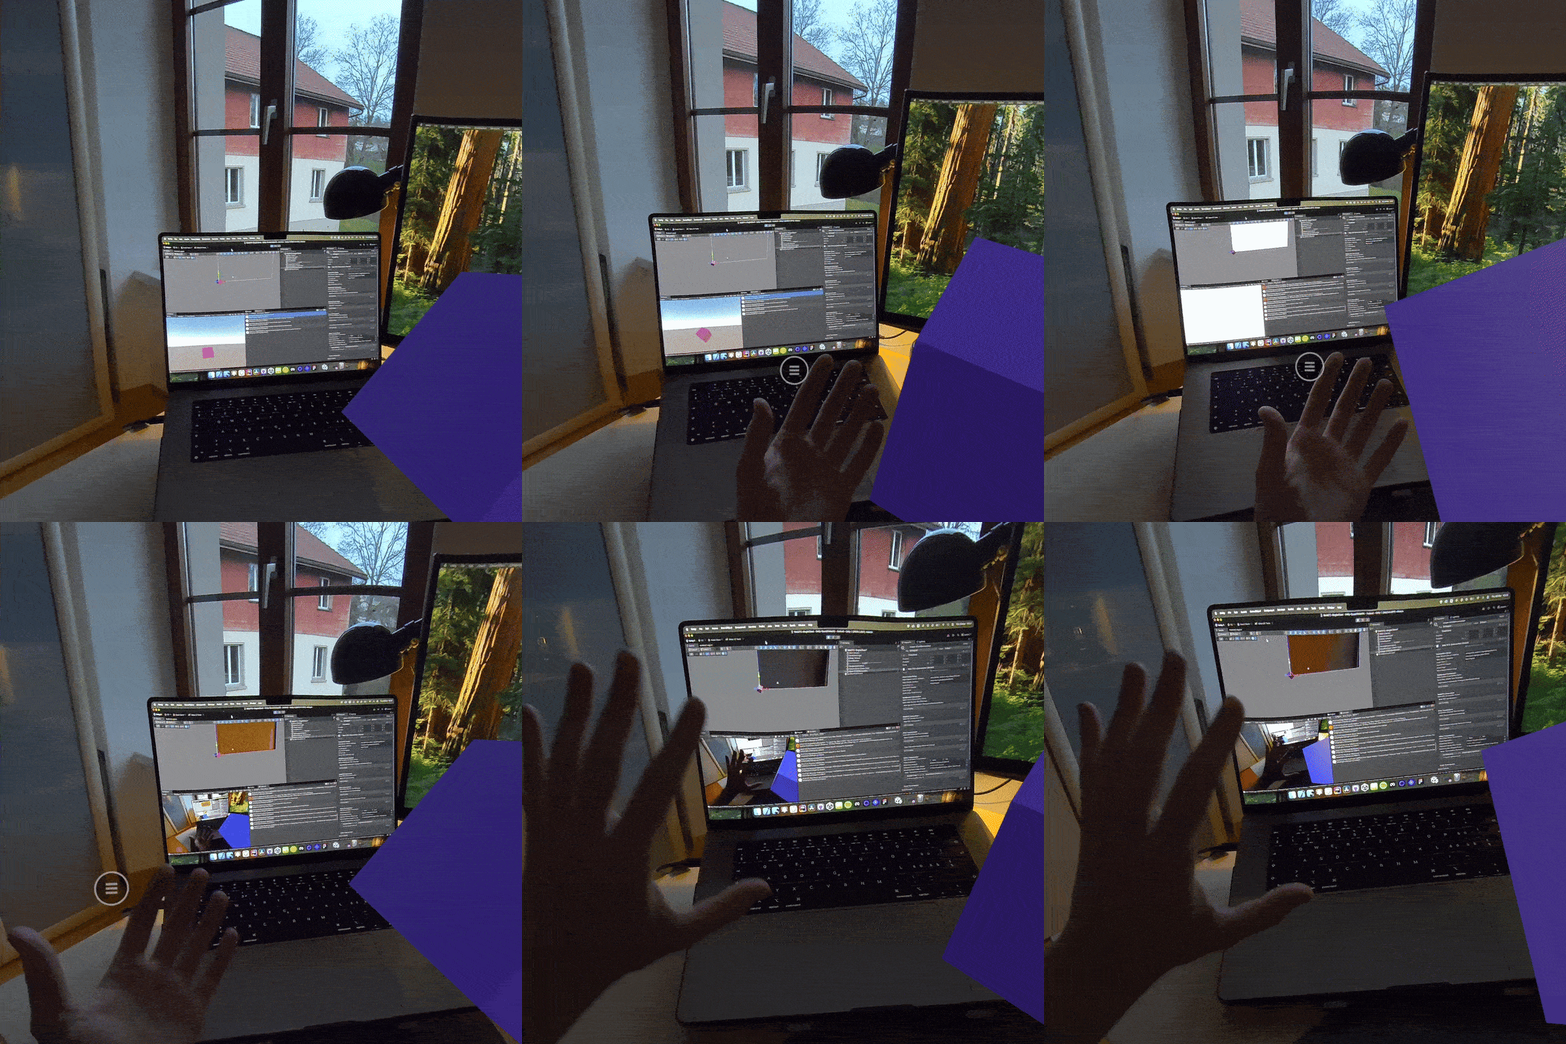
Explore stereo passthrough mapping, frosted glass, and wavy portal materials in one scene. The sample uses both camera feeds and exposes per-eye UV offsets for calibration.
Record a question, transcribe it, send the text and a camera frame to OpenAI, and play the response with text-to-speech.
- Configure a private development API key on the scene’s
ImageOpenAIConnector/ OpenAI Manager. - Choose the model and command mode, connect to the network, and grant microphone permission.
- Press the controller Menu/Start button to start or stop recording. Recording also stops at the configured maximum duration.
Keep real keys out of commits and distributed APKs. For a shipped application, route authenticated requests through your own backend. This sample requires an OpenAI account with API access; network requests may incur charges.
OpenAI.vision.whisper.model.mp4
Stream camera video using SimpleWebRTC, Unity WebRTC, and NativeWebSocket.
- Configure your own WebSocket signaling server on both peers. In
WebRTC-Quest, the connection is under[BuildingBlock] Camera Rig/TrackingSpace/CenterEyeAnchor/Client-STUNConnection. - Enable WebSocket Connection Active after replacing the placeholder address. Signaling connections are disabled by default.
- Run
WebRTC-Queston the headset and openWebRTC-SingleClientas the receiving peer in Unity. - Press the Quest controller Menu/Start button to begin transmission.
See the signaling setup tutorial. Both peers must be able to reach the signaling server; successful signaling alone does not prove video is flowing.
An XR Skillslab prototype tracking a physical puppet's skeleton via passthrough, eventually to drive a bone rig from it. Streams the passthrough camera directly into a Unity.WebRTC VideoStreamTrack via PassthroughWebRTCStreamer + PassthroughCameraAccess (no SimpleWebRTC — an earlier version of this sample used the 6 WebRTC sample's SimpleWebRTC package, but its "camera photographs a UI canvas" capture path never produced a reliable image).
- Start the signaling server in
SignalingServer(npm install && npm start) and note the machine's LAN IP. - In
PuppetTracking-Quest, setsignalingServerUrlon thePassthroughWebRTCStreamercomponent tows://<that-lan-ip>:3000. - Run
PuppetTracking-Queston the headset, aim it at the puppet, and openhttp://<that-lan-ip>:3000in a browser on the same network, then click Connect. - No manual "start transmission" step is needed — the live passthrough image should appear automatically in the browser viewer once the camera is playing and the browser has registered.
- Check Enable pose detection in the browser and enter the puppet's shoulder-to-hip length (cm) — the detected skeleton is sent back over the WebRTC data channel and drawn as a 3D overlay on the real puppet by
PuppetPoseVisualizer.
See SignalingServer/README.md for protocol details, troubleshooting, and how the browser-side pose detection + placement math works.
OnDeviceBlazePoseDetector runs the same pose model directly on the Quest, feeding the
same PuppetPoseVisualizer without any PC/browser in the loop — disabled by default on the
"WebRTC Controller" GameObject so it can be compared side-by-side with the WebRTC path
rather than replacing it outright. It uses Google's BlazePose converted to ONNX by Unity
(the same model MediaPipe's browser-side PoseLandmarker runs), via com.unity.ai.inference
— ported from Unity's own sentis-samples BlazeDetectionSample.
The three model files (~21MB total) aren't committed — download them once into
Unity-QuestVisionKit/Assets/Samples/7 PuppetTracking/Resources/Models/:
curl -L -o pose_detection.onnx "https://huggingface.co/unity/inference-engine-blaze-pose/resolve/main/models/pose_detection.onnx"
curl -L -o pose_landmarks_detector_lite.onnx "https://huggingface.co/unity/inference-engine-blaze-pose/resolve/main/models/pose_landmarks_detector_lite.onnx"
curl -L -o anchors.csv "https://huggingface.co/unity/inference-engine-blaze-pose/resolve/main/data/anchors.csv"
Then enable OnDeviceBlazePoseDetector (and disable PassthroughWebRTCStreamer's data
channel consumer if comparing head-to-head).
Status as of the last real-device round of testing: detection reliability is the open problem, not raw framerate. Findings so far, roughly in the order we found them:
- The unmodified ported sample re-ran the full-frame person detector every single frame; a
small/hand-held subject only fills a tiny fraction of the passthrough camera's wide field
of view, so it almost never scored above the detection threshold. Fixed by reusing the
landmark model's own two alignment keypoints (indices 33/34 of its 39-point output) to
derive next frame's crop directly, only falling back to the full detector when that
tracking confidence drops (
OnDeviceBlazePoseDetector.minTrackingConfidence) — this is the same trick MediaPipe's own runtime uses to stay locked on across frames. scoreThresholddefaulted to Unity's sample value (0.75); MediaPipe Tasks Vision's own default (which the browser path benefits from without ever overriding it) is 0.5 — fixed.- The detector padded the frame out to a square instead of cropping to the shorter side, wasting a third of its 224×224 input on empty letterbox bars — fixed by cropping instead (loses some peripheral FOV, trades it for effective resolution on the subject).
- Even after all of the above, a 130cm child at ~2m (a proper human-scale subject, not a puppet) still frequently failed to detect — meaning the remaining gap likely isn't only about subject scale anymore, but also basic recall of the single-highest-anchor argmax detector versus a real NMS/multi-candidate approach. Not yet attempted.
- Skeleton jitter (once detected) is a separate axis from detection reliability -
addressed with a 1€ filter per landmark (
PuppetPoseVisualizer, seeOneEuroFilter.cs), tuned toward heavy, non-adaptive smoothing since the tracked subjects here (mannequins) do not move on their own - any apparent velocity in the raw signal is detection noise, not real motion worth staying responsive to. PuppetTrackingStatusHudnow shows the on-device detector's live state (Mode: Detecting/Tracking, last detection score, last tracking confidence) in-headset, since "sometimes visible, sometimes not" was otherwise impossible to debug further - failing to ever detect and losing an acquired track too eagerly look identical from the outside but need different fixes.- Not yet tested: a full-size mannequin (the actual target hardware for this prototype, distinct from the small hand-held test dummies) - plausibly closer to BlazePose's training distribution at a normal viewing distance, which would make the remaining detector-recall question moot for that specific case even if it isn't fixed in general.
The project pins its dependencies in manifest.json and packages-lock.json.
| Component | Pinned version |
|---|---|
| Unity Editor | 6000.3.12f1 |
| Meta XR Core / MRUK | 205.0.0 |
| Unity Inference Engine | 2.6.1 |
| OpenXR / Meta OpenXR | 1.18.0 / 2.6.1 |
| Universal Render Pipeline | 17.3.0 |
| Unity WebRTC | 3.0.0 |
| Quak device testing | 0.4.0-alpha.1 |
SimpleWebRTC and NativeWebSocket are pinned to Git revisions. See third-party dependencies for provenance and licensing.
The testing guide covers individual and combined APK builds, Unity regression checks, scene audits, and the included Quak device tests. Quak is the renamed XRQA project.
For a quick repository check:
python3 scripts/check_repo.py
git diff --check
The September 2026 maintenance pass built the combined app and all six individual Android ARM64 IL2CPP samples, passed Unity regression and missing-script checks, and passed GitHub repository checks and CodeQL. On-device acceptance remains pending: the available Quest 3S session was blocked by the system sensor lock. ImageLLM cloud requests and WebRTC peer streaming also require their external setup and validation.
| Symptom | Check |
|---|---|
| Camera feed does not start | Keep the headset awake and unlocked, accept permissions, and confirm you are running a headset build. |
SensorLockActivity blocks launch |
Put on the headset and press its physical Power button once to clear the lock, then retry. |
| QR codes do not appear | Check the native panel’s supported/enabled state and spatial-data permission; use a clear QR code in good light. |
| Packages fail to resolve | Use the pinned Unity editor; verify network/Git access and let Package Manager finish. |
| Assets are missing after cloning | Run git lfs pull, then the repository check above. |
| ImageLLM does not respond | Check the private API key, model access, microphone permission, and network connection. |
| WebRTC does not connect | Configure both peers, enable their signaling connections, and confirm the server is reachable. |
| Non-development build rejects Quak | Disable its OpenXR injection layer as described in the testing guide. |
Explore the community showcase for tutorials, experiments, and projects built with Quest camera access. Contributions are welcome—see CONTRIBUTING.md and the code of conduct.
Report an issue · Join Discord · Follow on X · LinkedIn
Please follow the media-hosting guide when adding demo images or videos.
- Thanks to Meta for the Passthrough Camera API and Passthrough Camera API Samples.
- Thanks to shader wizard Daniel Ilett for helping me in the shader samples.
- Special thanks to Markus Altenhofer from FireDragonGameStudio for contributing the WebRTC sample scene.
- Special thanks to Thomas Ratliff for contributing his shader samples to the repo.
QuestCameraKit is MIT licensed. Included third-party code and packages retain their own licenses; see third-party dependencies. A credit or link back is always appreciated.